If you’re looking for a short (around 5km) but challenging trail that leads you through the untouched beauty of the Blue Mountains, look no further than the Porters Pass & Colliers Causeway Trail (return via Clifftop Track).
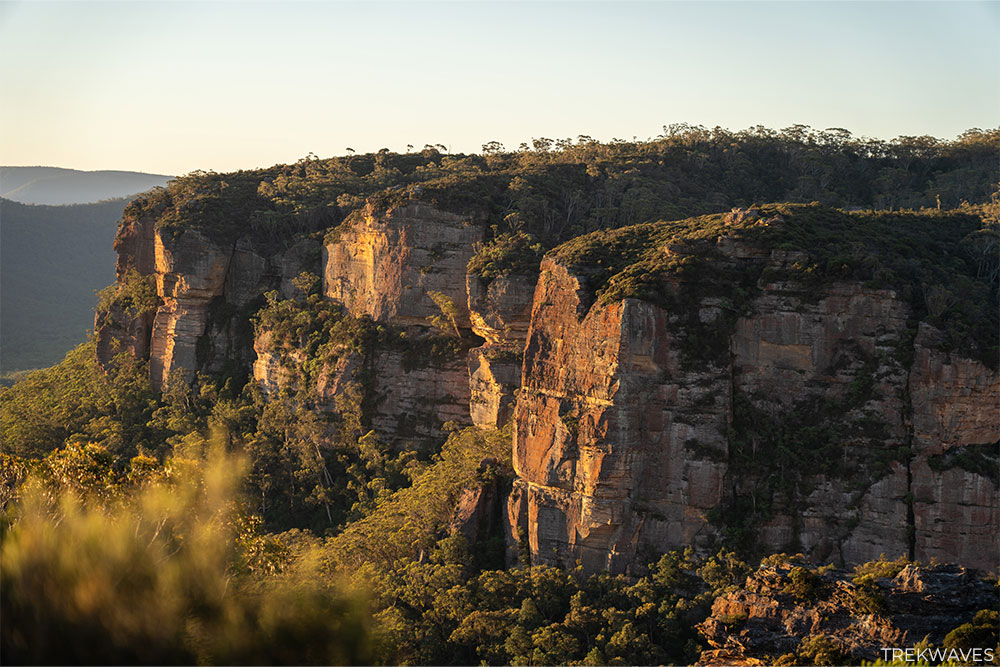
Here you’ll get a chance to walk beside towering rock walls, venture through canyons filled with the soothing sounds of cascading waterfalls, all while having the chance to witness an amazing sunset at the Fort Rock.
And what sets this trail apart?
It’s not a super popular, touristy type of trail, so you won’t be encountering hordes of other hikers.
Instead, expect to come across rock climbers, mingle with the locals, and revel in the peaceful serenity of this beautiful trail.
If you’re ready to find out more about this hidden gem of a trail, keep on reading – I’ll provide you with a detailed guide.
How To Get To Porters Pass & Colliers Causeway Circuit
Getting There By Car
Beginning of the trail is located at the end of the Burton Road (click here for Google Maps pin) in Blackheath.
It’s just a regular street—no official parking area. Park wherever there’s an open spot along the road.
Alternatively, you can park at the end of Ada Road and walk down from Colliers Lookout. I haven’t given that route a try, but it’s clearly marked on the map.
Getting There by Train
Here’s some good news if you’re thinking of using public transport—the trailhead is just a 1.2 km walk from Blackheath station.
And, taking another peek at the map, there’s an even better way to tackle this loop with public transport.
Begin from the end of Bundarra Road, which is only 650m from the Blackheath train station.
Starting here means you’ll be following signs to Fort Rock. You can either head south via Centennial Glen Track to Colliers Causeway or go north via Clifftop Track to Burton Road.

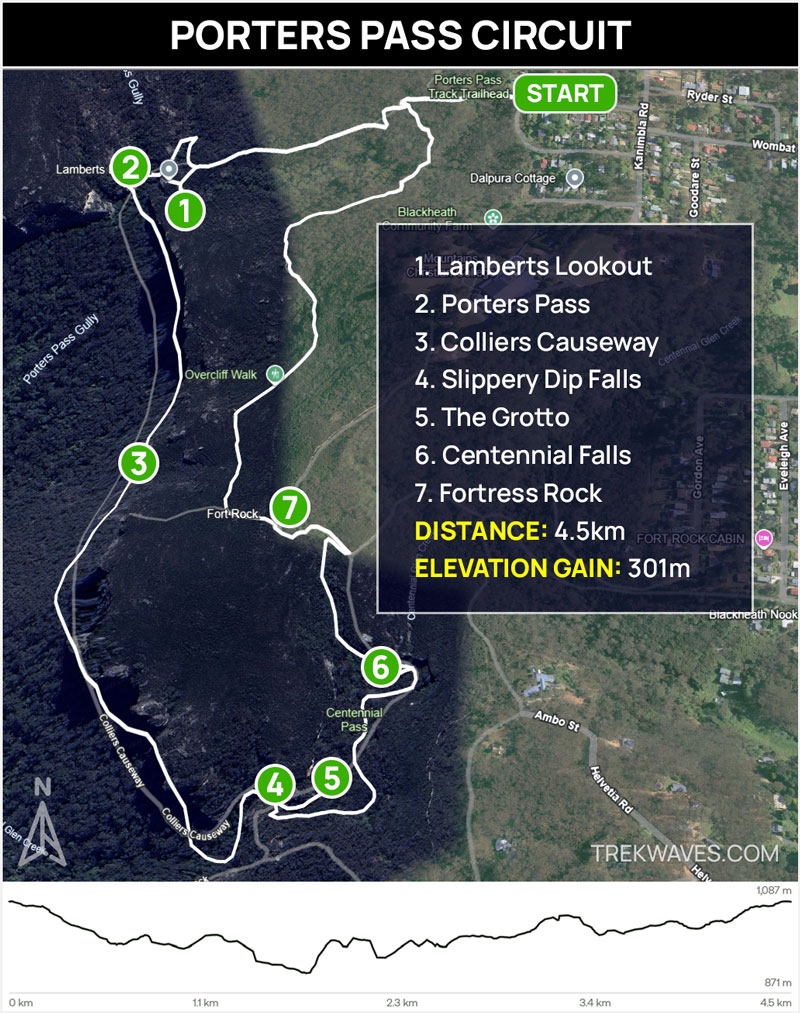
Porters Pass Circuit Trail Overview
- Distance: 4.5 km circuit
- Time: 2-3 hours
- Total Ascent: 301m
- Difficulty: Moderate to Hard
This trail is marked as hard, and there’s some truth to it. Some sections are really steep, parts of the trail are overgrown, and the terrain is uneven, forcing you to pay close attention to where you step.
Personally, I’d call this trail moderately challenging. I would consider giving it a hard rating only if it were the same trail but twice the distance and elevation.
Best Route for Hiking Porters Pass
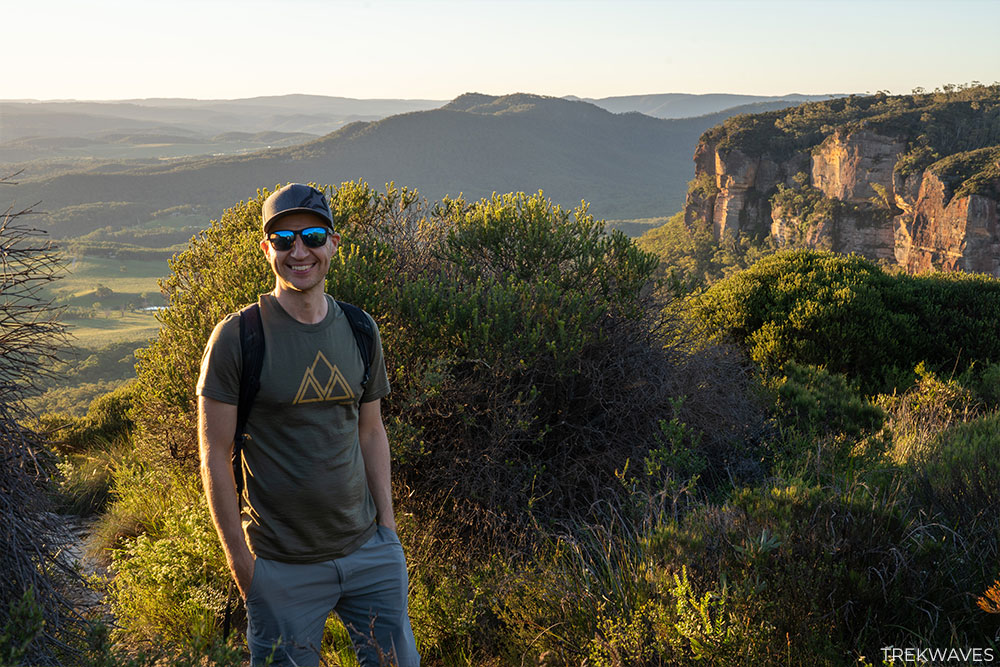
It’s totally up to you on which way to go, but my choice was to begin the walk around 5 pm, going in the anti-clockwise direction.
The idea was to enjoy the sunset at Fort Rock and take in the stunning view that unfolds along the Clifftop Track at this time of the day, offering a panoramic look at Kanimbla Valley.
If I were to start the trail early in the morning, I’d probably opt for the clockwise direction.
But hey, it all boils down to personal preference.
Along the Porters Pass Track
As you’ve probably noticed on the trail map, the initial stretch leading to Porters Pass involves a gentle descent, with the steepest section coming towards the end.
If you’re taking the anti-clockwise route, ensure you keep straight at the first junction 200m into the trail and follow the sign pointing to Porters Pass.
Once you navigate through a narrow and, well, possibly muddy section (it was when we hiked there), the path becomes steeper.

Into The Porters Pass Recreational Reserve
The rainforest gully stretch of Porters Pass offers a swift transformation in scenery, creating a beautiful segment of the walk.
Suddenly, the scenery transforms, and you’re surrounded by a lush rainforest, with towering overhangs, accompanied by the soothing sounds of water flowing from the nearby Porters Gully.
Both Porters Pass and Centennial Pass bear local significance and they are linked with early Blackheath residents such as Timothy Porter (who came across it after 1880), James Wall, and Henry Collier.
These trails resonate with tales of the past, once serving as pathways to broaden hunting opportunities.
Unfortunately, we didn’t get to thoroughly check out the ins and outs of Porters Pass. We were moving pretty quickly right from the start, and the lighting inside the pass was a bit on the dim side at that time of day.
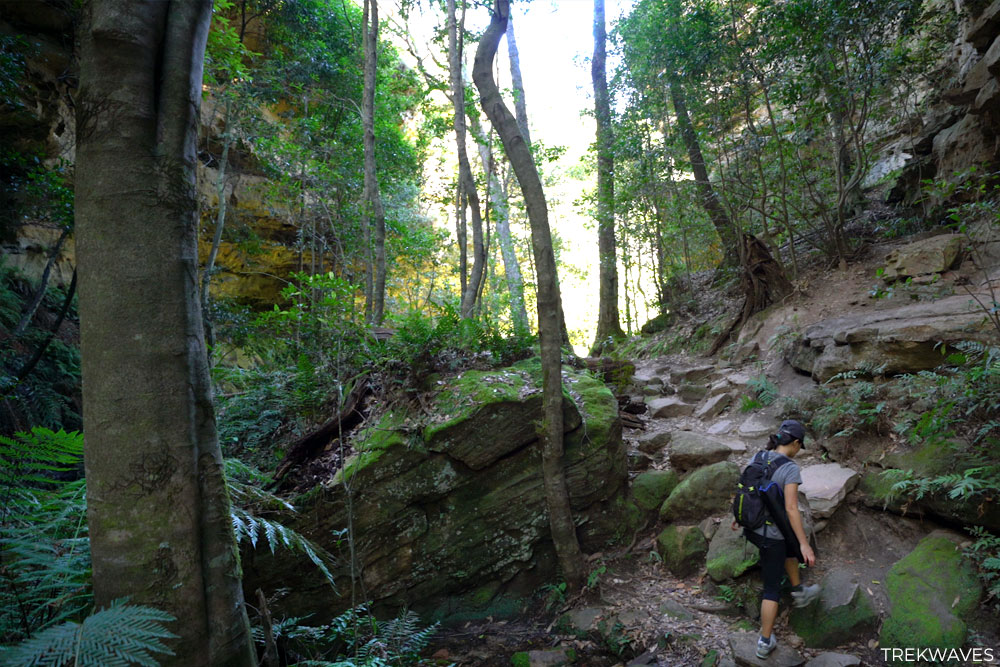
After stepping out of the lush beauty of Porters Pass’s rainforest, the trail starts to open up to more open surroundings.
Eventually, you’ll reach a ‘lookout’ spot offering a great view of the Colliers Causeway trail you’ll tread upon once you descend from the pass.
There’s a short side trail to Lambert’s Lookout around here, but it appears we might have overlooked it with our brisk pace.

Colliers Causeway
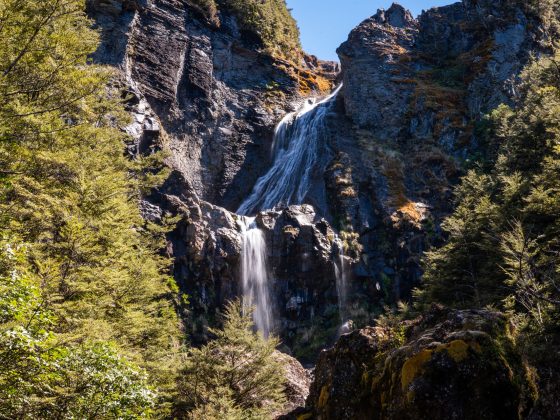
Once you pass Porters Pass Gully and catch sight of a small waterfall on your left, keep an eye out for a narrow gap in the cliff line.
That’s where Porters Pass wraps up, and the Colliers Causeway begins.
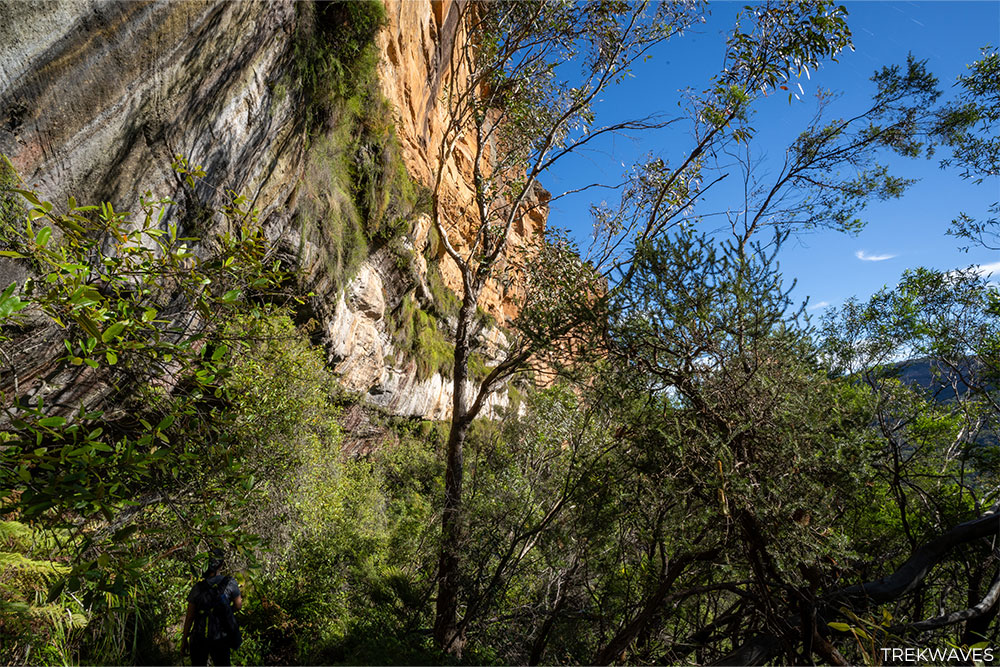
Step through this gap, and suddenly, you’ll find yourself in a wide-open space, with a towering cliff on your left and a hiking trail running right alongside.
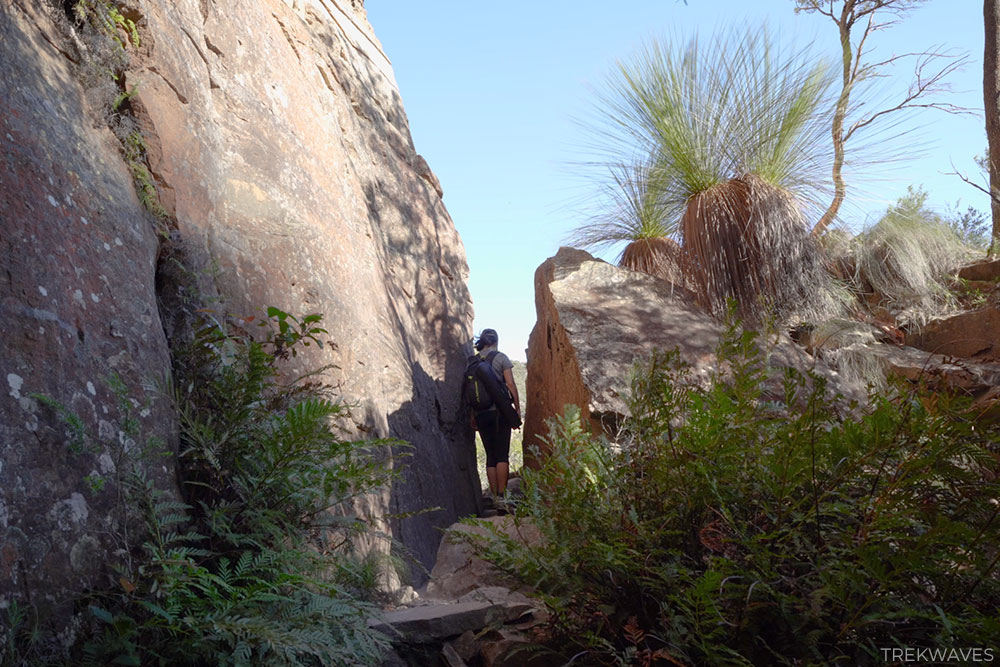
I must admit, the Colliers Causeway stood out as my favorite part of the entire walk. Its mix of loose rocks, roots, and uneven terrain demands your undivided attention, making you stay focused on the trail and each step you take.
The gentle, late evening sunlight during our walk saturated the rocks with vibrant colors, and a gentle breeze added to the overall enchanting hiking adventure.
The trail seems untouched, overgrown and narrow in many places, providing an amazing ‘raw hiking experience’.
I have a soft spot for those untouched trails, and this part of the trek embodies the quintessential Australian bush adventure.
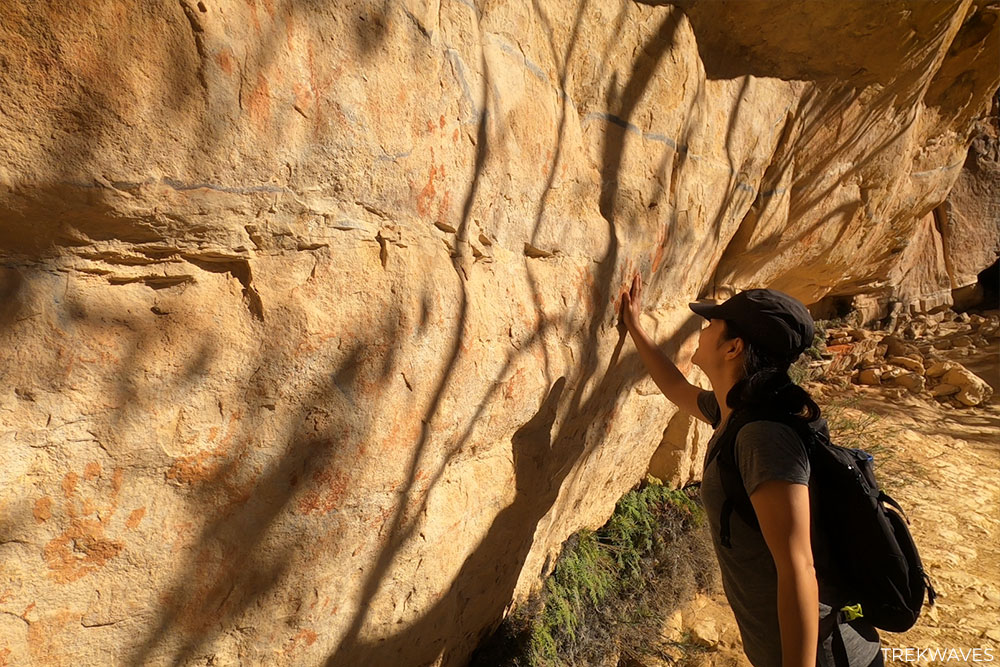
Right in the heart of the Colliers Causeway trail, there’s this massive overhang wall adorned with plenty of red (or rather dark orange) handprints.
While they might not be authentic Aboriginal art, it’s still a captivating spot to hang out, capture some photos, and enjoy the vibrant rock colors that perfectly complement the handprint art.
Into the Heart of Centennial Glen
After covering about 2.1 km, the scenery starts to shift, and you’re entering the captivating part of Centennial Glen.
This is where you need to pay a bit more attention because there are a few side trails to Centennial Pass and Walls Ledge.
Just stick to the signs for Centennial Glen Track, plus there’s a little side trail that leads to Centennial Glen Canyon.
Here, you can see Slippery Dip Falls, the first waterfall you’ll see along the Centennial Glen Creek.
After a quick break by the falls, get ready for a climb alongside the creek. Watch your step on the steep, wet stairs close to the flowing water and don’t forget hold onto the railing!
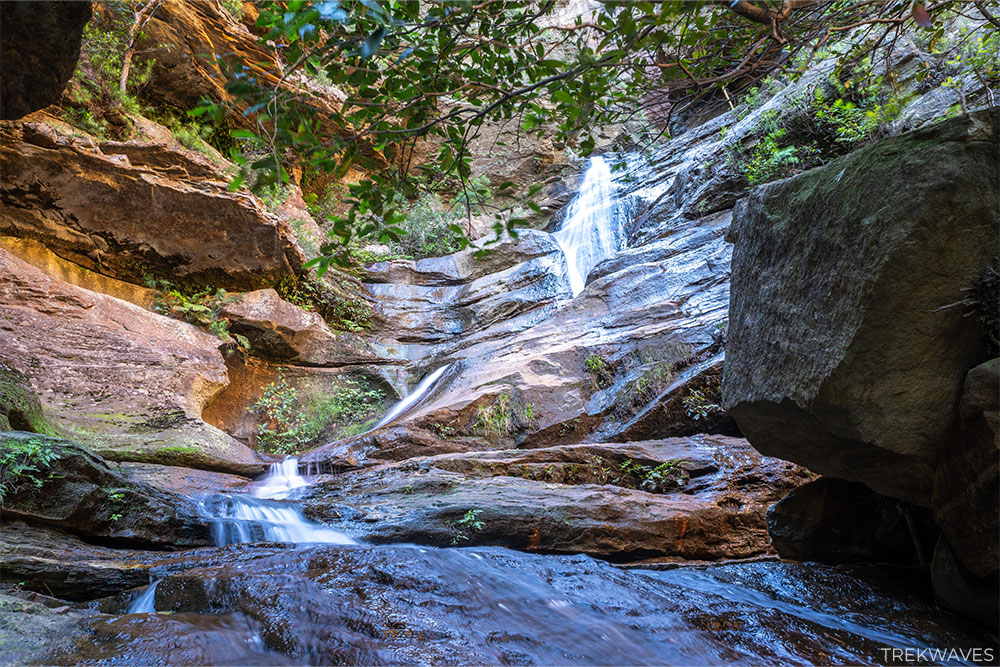
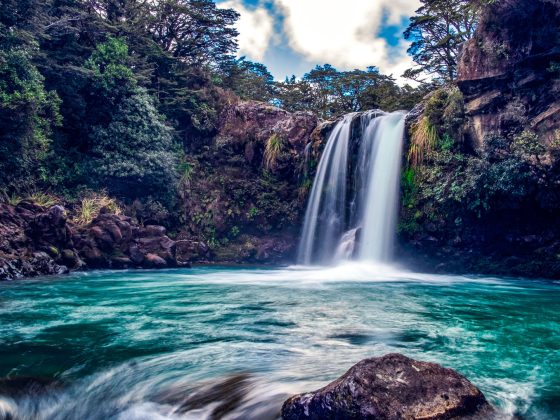
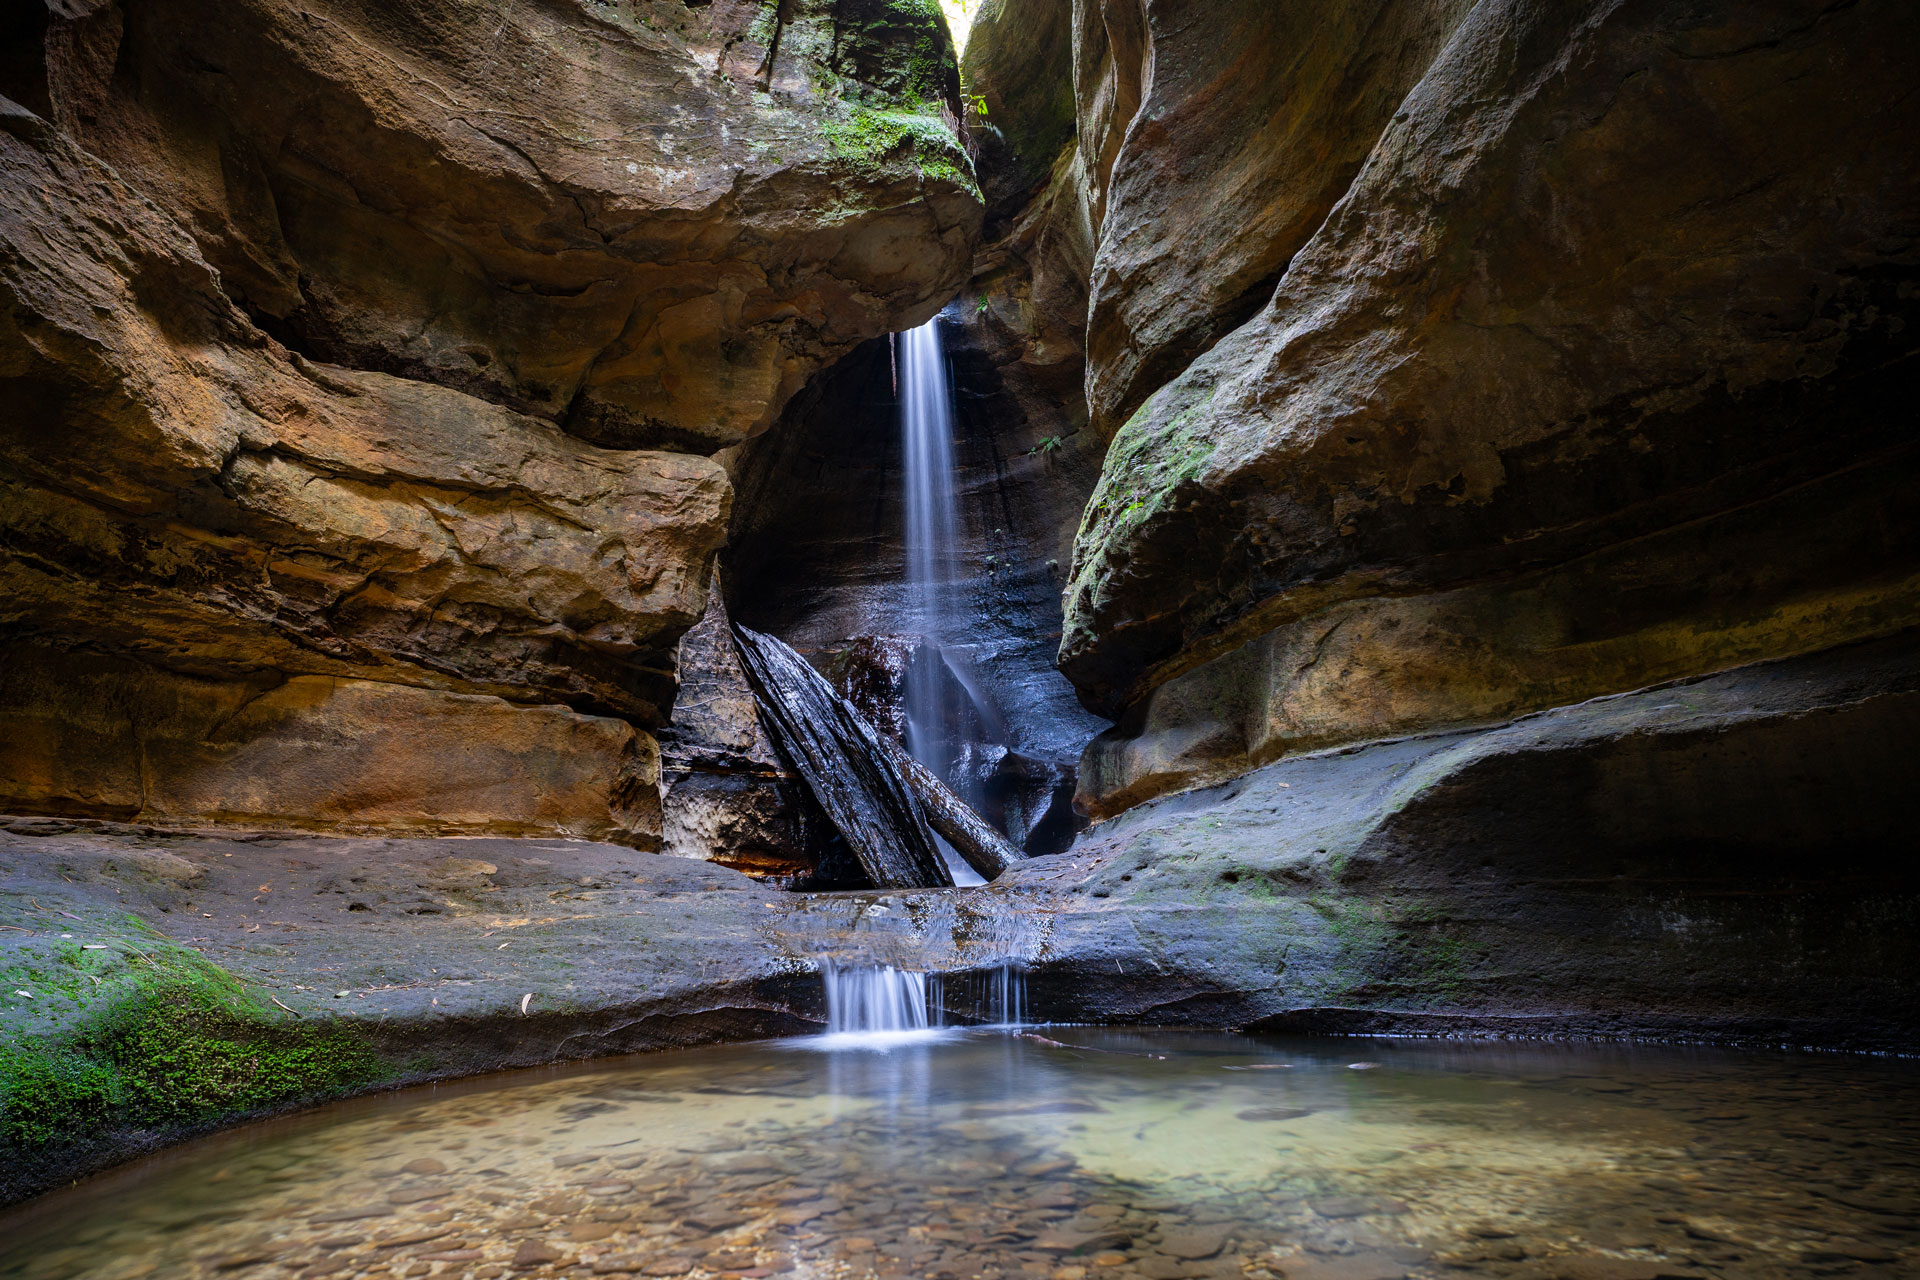
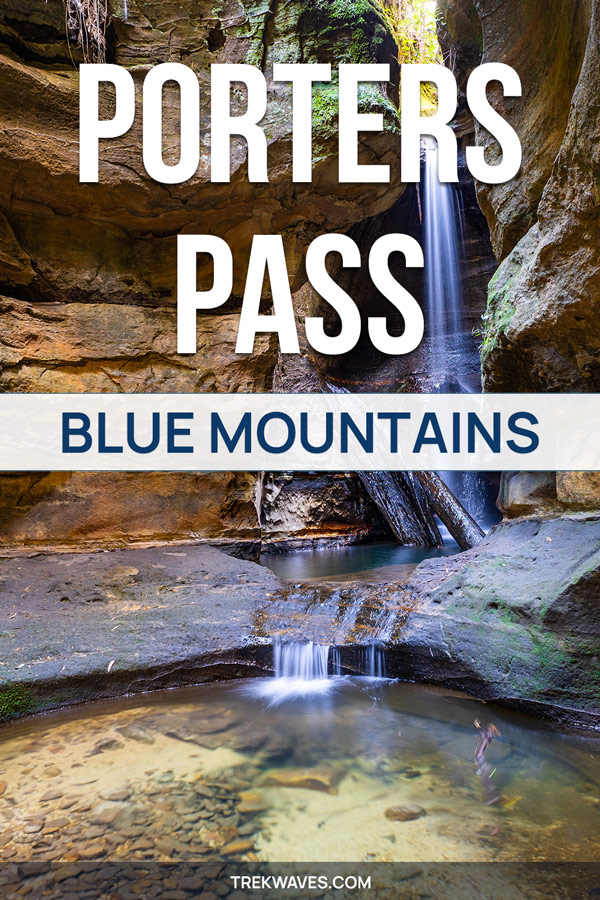
The Grotto – Centennial Glen Slot Canyon
The Grotto is the go-to spot for photos in Centennial Glen—it’s this awesome waterfall and swimming hole tucked into a convenient slot canyon.
After a quick climb, you’ll hit a junction with multiple signs. Remember to go left, following the sign for ‘Canyon’.
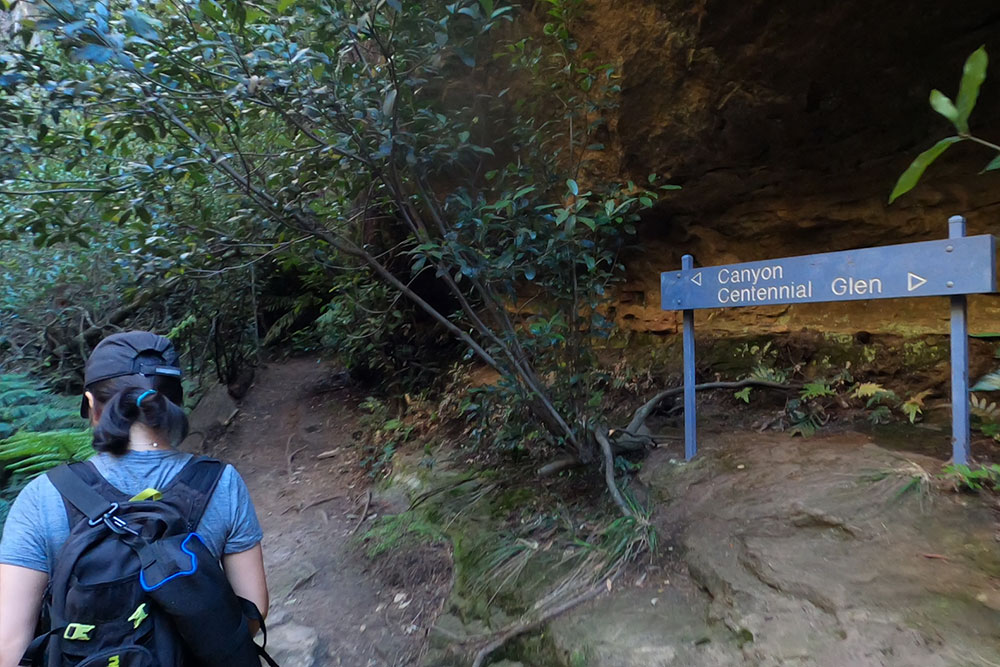
The canyon is just 50 meters from the signpost, and to get up close, you’ll need to take off your shoes and walk through the center or attempt to scramble across the narrow rock ledge on the right.
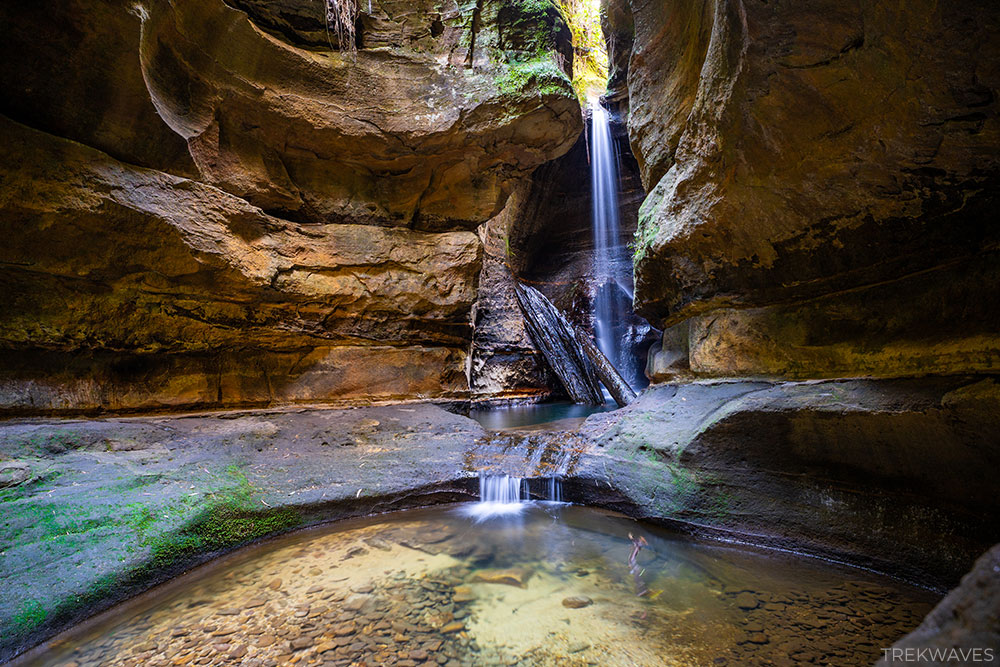
The canyon is definitely a highlight of the hike, and taking the time to get inside makes the effort very rewarding.

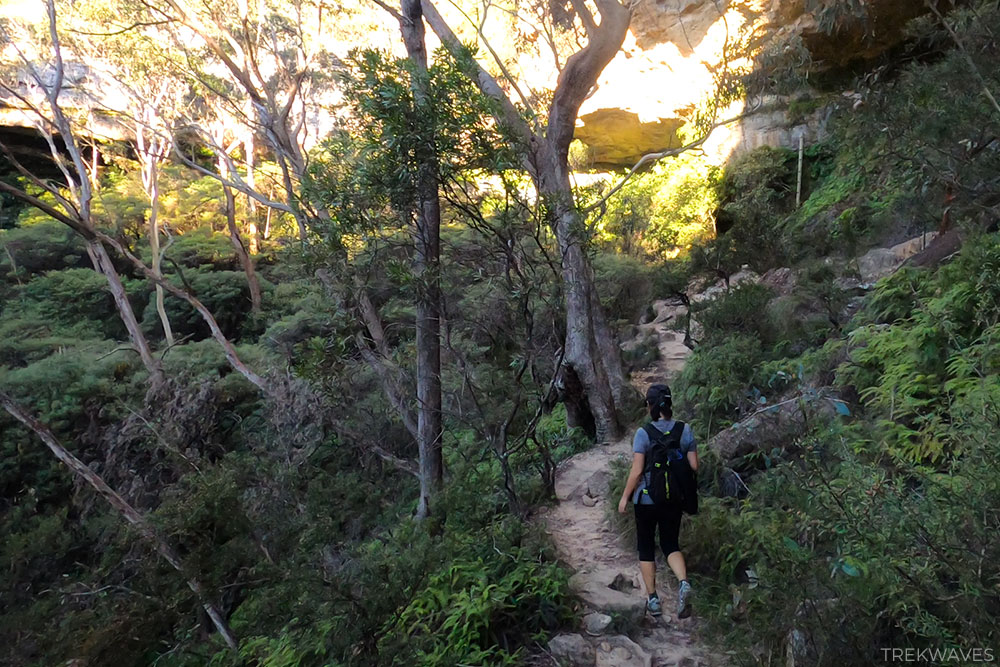
Centennial Glen Track
After immersing yourself in The Grotto’s beauty, backtrack to the same junction. But this time, choose the upward trail, signposted as Centennial Glen.
The path gradually ascends, guiding you through a stunning canyon with Centennial Glen Creek on your left and imposing cliff walls on both sides of your walk.
You will walk under a waterfall (Centennial Falls) and perhaps witness a few rock climbers in action.
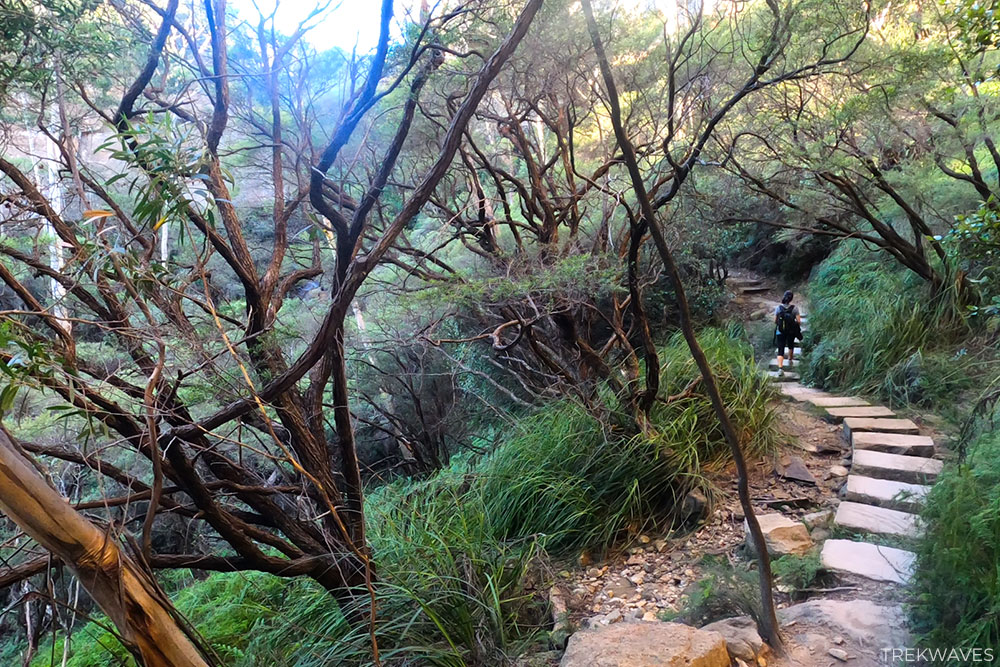
The final leg of this segment features a challenging climb, and when you reach the top, you’ll encounter a wonderful area adorned with numerous rock slabs—an ideal spot for a quick break before you move on to Fort Rock.
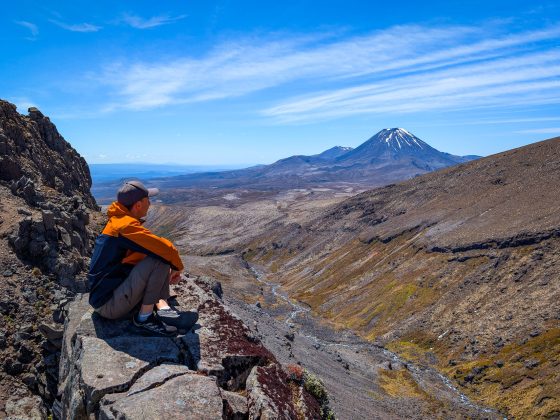
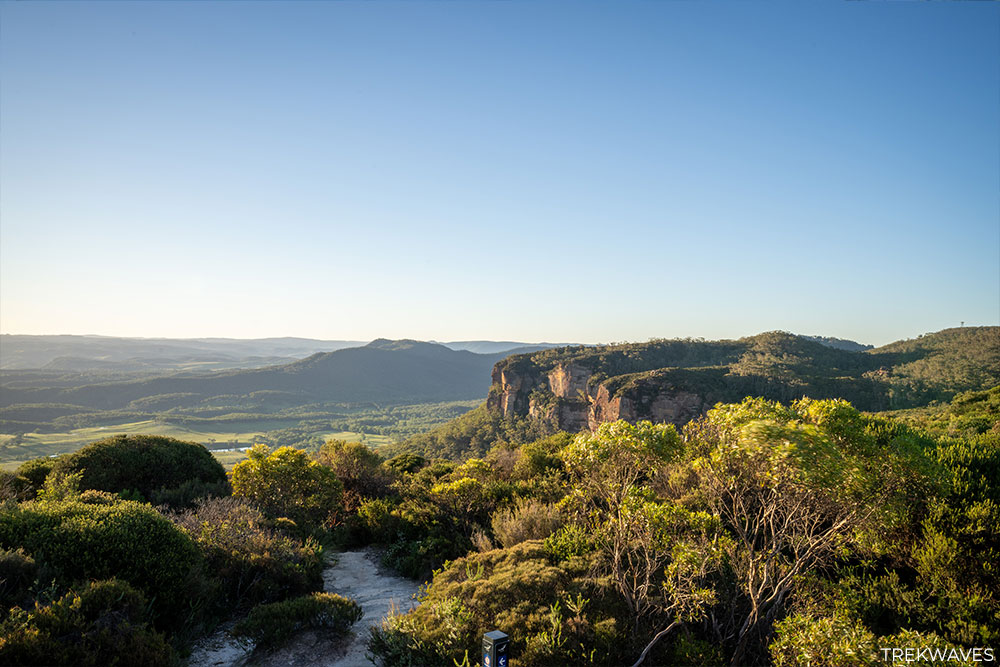
Fort Rock
Fort Rock is just a short distance from where you completed your last climb.
If you started your hike around the same time and followed the same path, get ready for a breathtaking view of the Kanimbla Valley painted in the colors of the setting sun.
Consider climbing the rock formation to enjoy an amazing 360-degree perspective of the entire area.
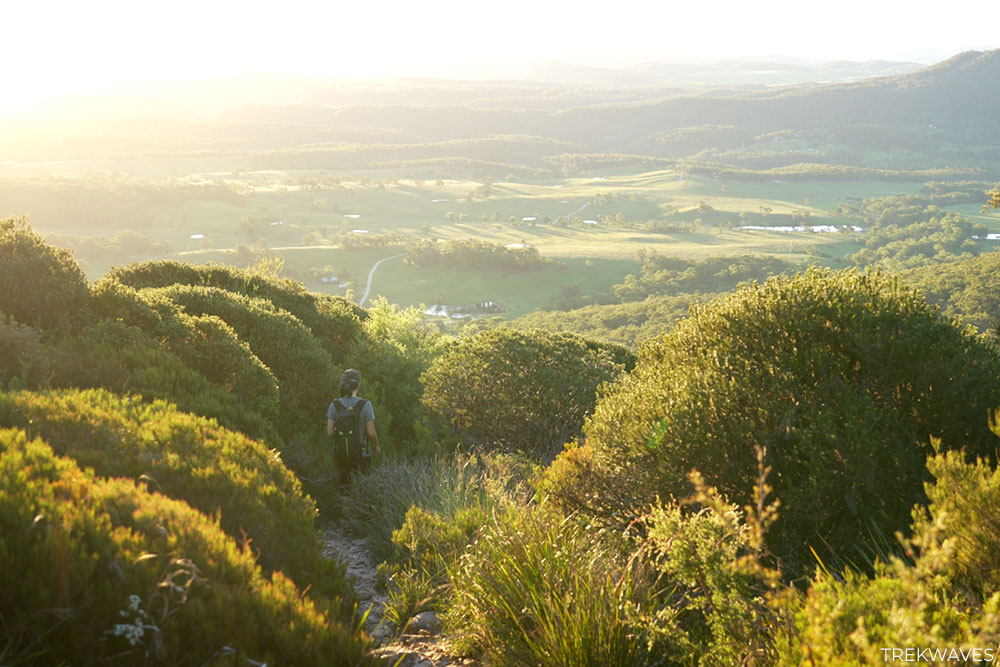
Heading Back via the Clifftop Track
The last leg of your trek takes you along the breathtaking Cliff Top Track. The views are simply fantastic, and the bush is low enough to let you soak in every bit of the scenery.
After covering just under 1km, you’ll delve into the bush, leaving behind the views as you tackle a steep uphill section.
Eventually, you’ll arrive at the familiar junction that led you into Porters Pass. Be sure to take a right turn and make your way back to the starting point at Burton Road.
Wrapping up my thoughts on this trail, I must say it’s now among my top picks for a delightful half-day hike in the Blue Mountains.
It offers a little bit of everything—imposing cliff walls, vibrant rainforests bustling with wildlife, meandering creeks, thrilling forays into canyons, challenging uphill stretches, and an untamed, authentic trail experience.
Found it Helpful? Pin it For Later!
Frequently Asked Questions
How long does the trail take?
- 2.5-3 hours
What about signage and trail quality?
- Despite having a decent amount of trail signs, navigating the trail demands a basic navigation skills.
How difficult is the trail?
- It is a hard rated track. I’d personally rate it as moderate to hard.
What should I wear?
- Wear good hiking shoes or boots as the trail has rough terrain, numerous sharp rocks, and sections that can be wet and muddy.
What essentials should I carry?
- Carry water, sunscreen, a hat, snacks, and insect repellent.
Is the trail wheelchair accessible?
- Unfortunately, the trail is not wheelchair accessible.
Can I swim on the trail?
- The trail features small, shallow creeks and waterfalls perfect for a quick dip or cooling your feet on a hot day
When is the best time to visit?
- Late in the evening.
Is there phone service?
- Most networks should have coverage.
Can I bring my dog?
- Yes