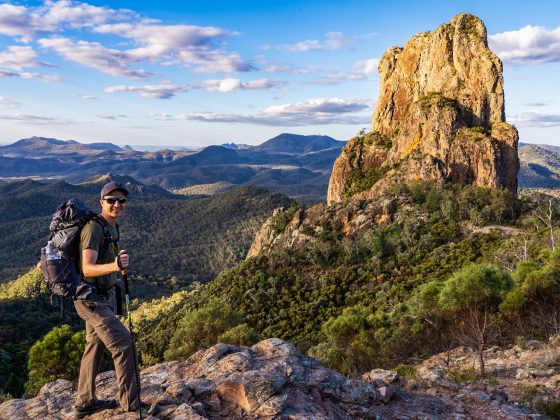
Would you like to explore a challenging yet stunning hike through unmarked trails in the captivating land of pagodas, that leads all the way to the picturesque Goochs Crater?
Get ready to be tested. This trek is going to challenge both your navigation abilities and your physical fitness.
It is a demanding 11 km return hike, which involves tackling over 500m of elevation gain and navigating through expansive valleys with creek and river crossings.
Moreover, there’s an added bonus when hiking to Goochs Crater from the southern direction:
The trail goes through the stunning wind-eroded Dargan Arch, a geological wonder formed ages ago when the ceiling of a cave worn by wind finally crumbled and collapsed, creating a magnificent skylight.
Let’s take a closer look at this trek and make sure you’re well-prepared for the journey ahead by providing you with all the essential information.
How to Get to Goochs Crater Trailhead
Beginning of the trail is located in Dargan, a small village in the northwest part of the Blue Mountains in New South Wales.
Just a heads up, reaching the trailhead requires driving a few kilometers along the unsealed Sandham Road.
I drove this road from the south, starting at Bell Rural Fire Brigade, with no problems in my 2WD car.
Here’s the Google Maps link to the trailhead.
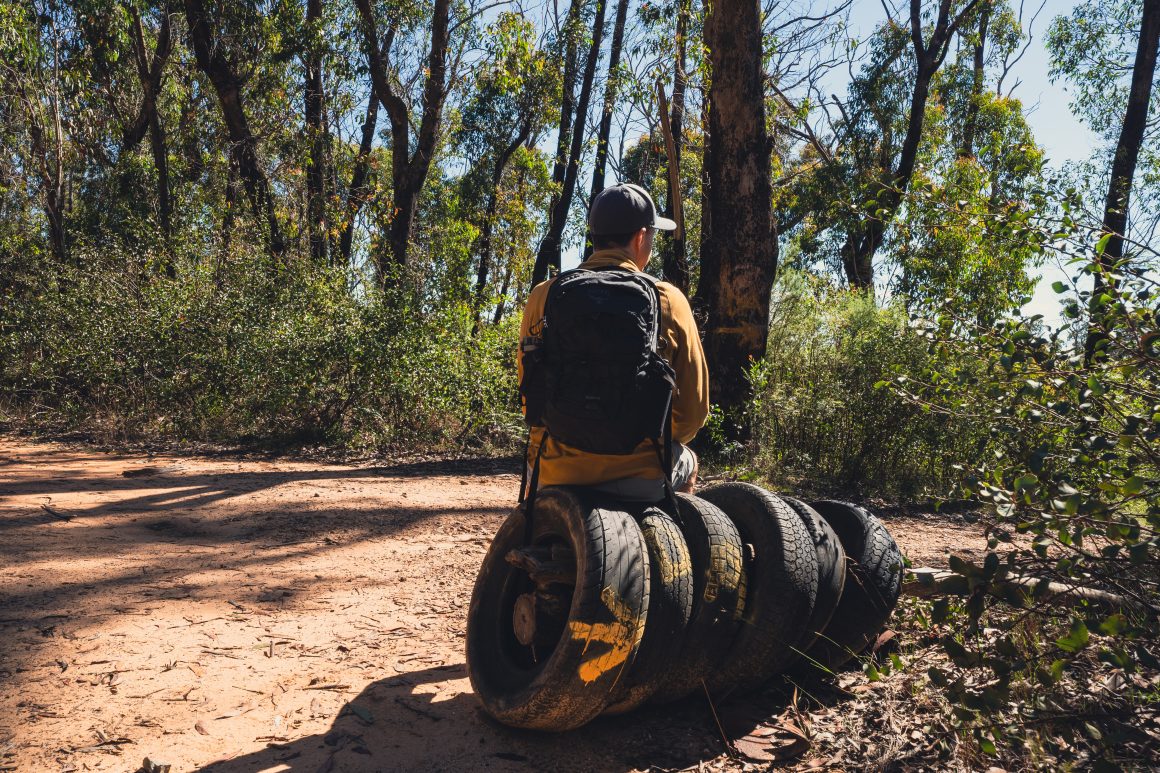
When you see a few tires lined up along the road, painted with yellow markings, you’ll know you’ve reached the start of the trail.
But before you punch it into your GPS and hit the road, I suggest taking the time to read through this entire article.
It’ll give you a good grasp of what to expect and help you get ready for this demanding trek.
Goochs Crater Trail Overview
- Distance: 10.8km return*
- Time: 4-6 hours
- Elevation Gain: 549m
- Difficulty: Hard (unmarked trails, bush bashing and rock scrambling. It requires good navigation skills)
*Keep in mind that the actual distance may turn out to be much longer, as you may lose the trail and engage in considerable rock scrambling while searching for the easiest routes in and out of the valleys.


Trail to Dargan Arch
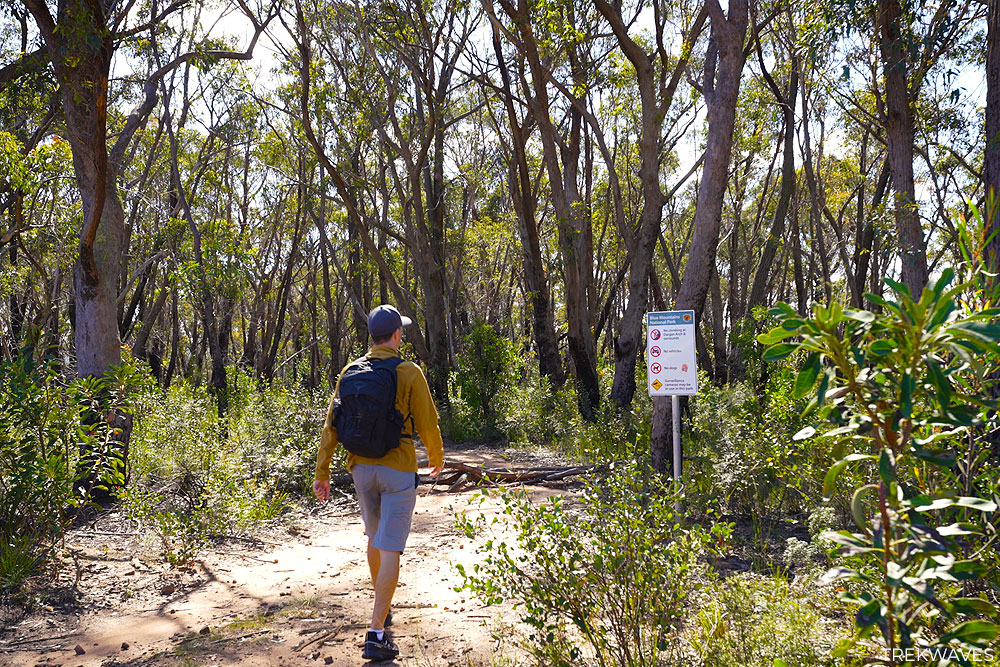
To reach Dargan Arch, start your journey with an easy downhill walk along a well-defined fire trail.
It spans about 800 meters, with a total descent of approximately 100 meters.
As you proceed, be on the lookout for a sign about 75 meters into the trail, marking the border of the Blue Mountains National Park.
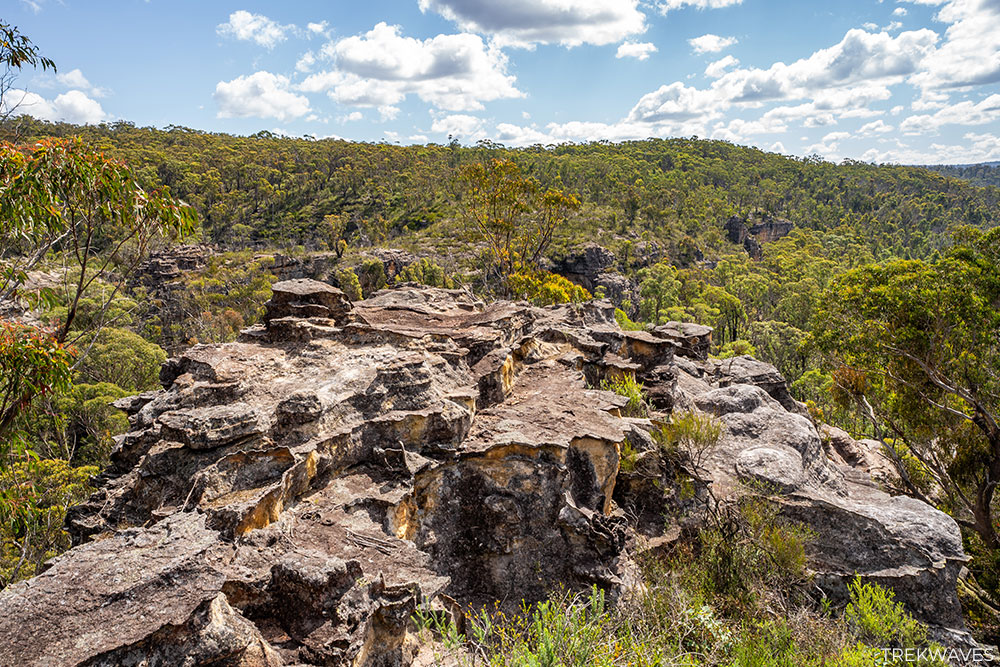
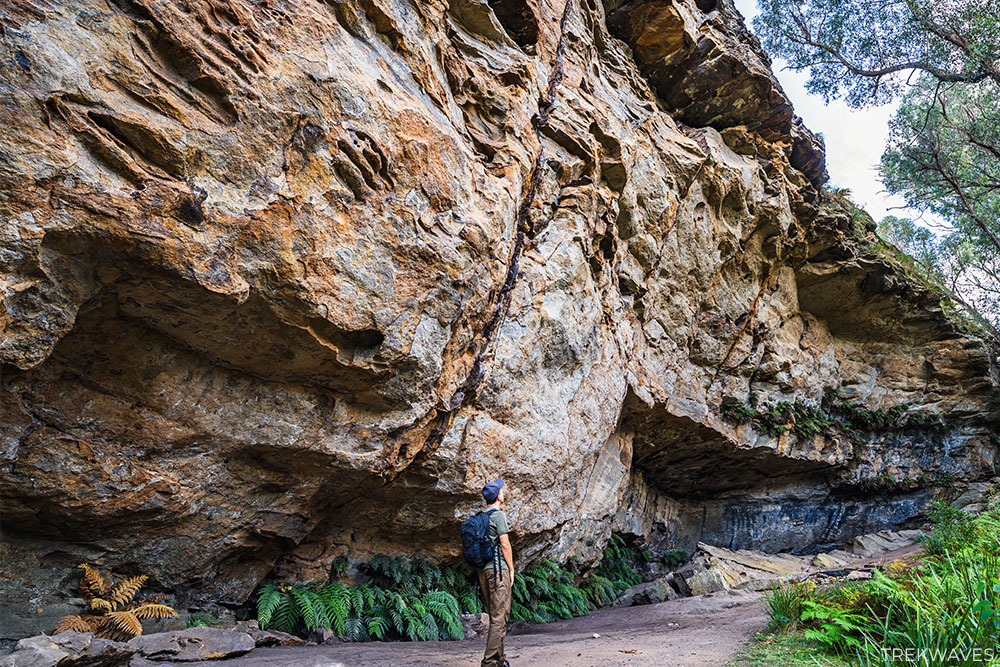
As you reach the end of the fire trail, there’s no clear path ahead, but go straight towards the rocky terrain. After a bit of exploration, you’ll come across a small, table-shaped rocky platform.
From this spot, you’ll be greeted with a first sight of Dargan Arch directly below you.

Dargan Arch extends for roughly 14 meters in length and is around 5 meters wide.

Getting To The Base of Dargan Arch
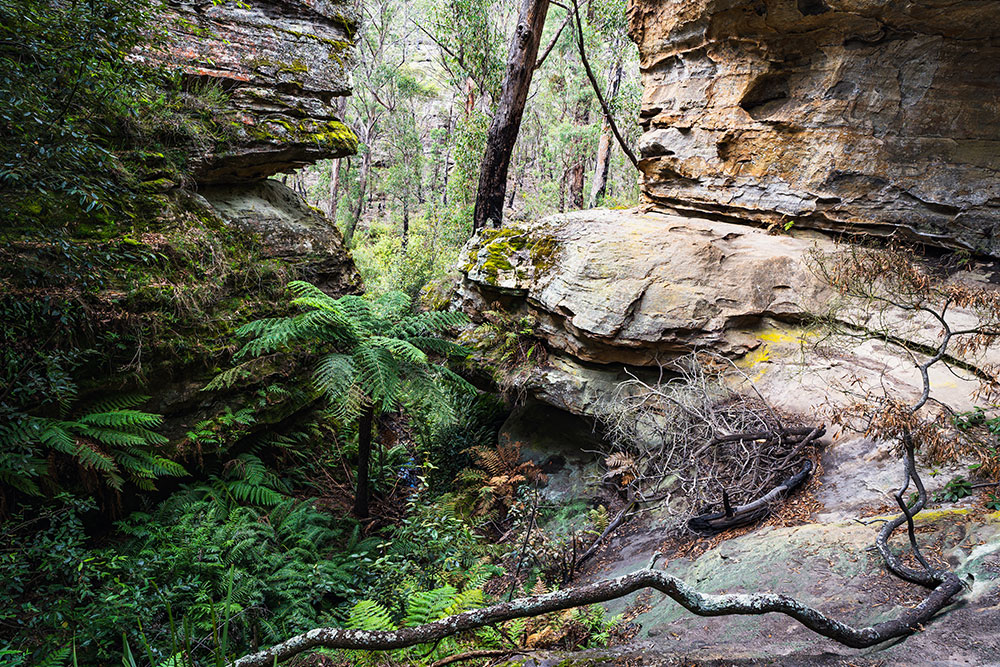
To reach the best vantage point for Dargan Arch, you’ll need to descend along the steep rock slab situated to the left of the arch (when viewed from above).
Here, you’ll have to follow an unmarked path that guides you to the base of the arch.

Just a short walk along the narrow and slightly overgrown path and over the fallen tree will lead you to the bottom of Dargan Arch, offering yet more fantastic opportunities for photography.


To continue along the trail towards Goochs Crater, you’ll need to follow the path through a few more smaller, wind-eroded caves.

Eventually, you’ll encounter a slightly challenging section where you need to go down another steep rock slab and under a very low rock ledge.
After successfully navigating through this section, you’ll come to a heavily overgrown small creek crossing.
While cairns have been placed to help you find the correct crossing point, it’s important to note that making your way through the bush here is anything but straightforward.
It’s strongly advised to wear long pants; attempting to cross without them could be quite challenging.

Trail to Wollangambe River
Once you’ve crossed the creek behind Dargan Arch, prepare for a steep ascent, passing by intriguing rocks and pagodas along the way.
Keep in mind that there’s no official trail in this area, so it’s imperative to rely on your navigation skills or a GPS device to get out of the valley.
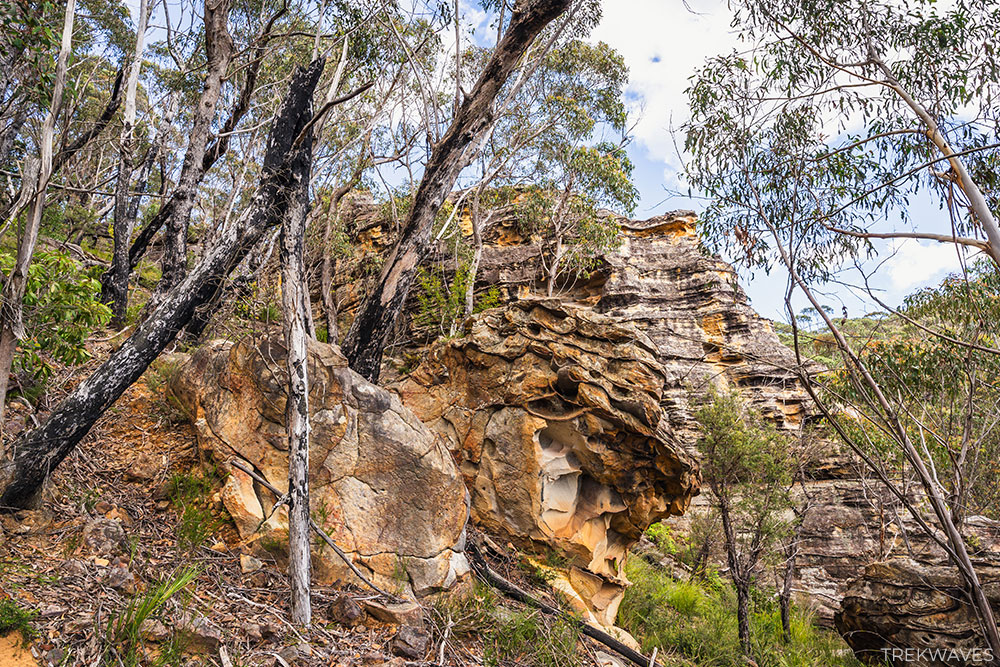
Aim to head mostly east with a slight southward direction. Be ready for some rock scrambling and bush bashing as you ascend above the rocky pagoda level and into the forest.

As you ascend out of this valley, don’t rush—take your time to appreciate the stunning views and diverse rock formations in the initial part of the climb.
As you ascend further, you’ll transition into the forested section of the trail, which eventually merges with a well-defined single track heading north and slightly west.
While this part of the trail may not be the most exciting, it does present an opportunity for a well-deserved rest following the challenging climb.
Following this trail along the ridge, expect the tree cover to eventually thin out, revealing breathtaking views of the surrounding landscape.

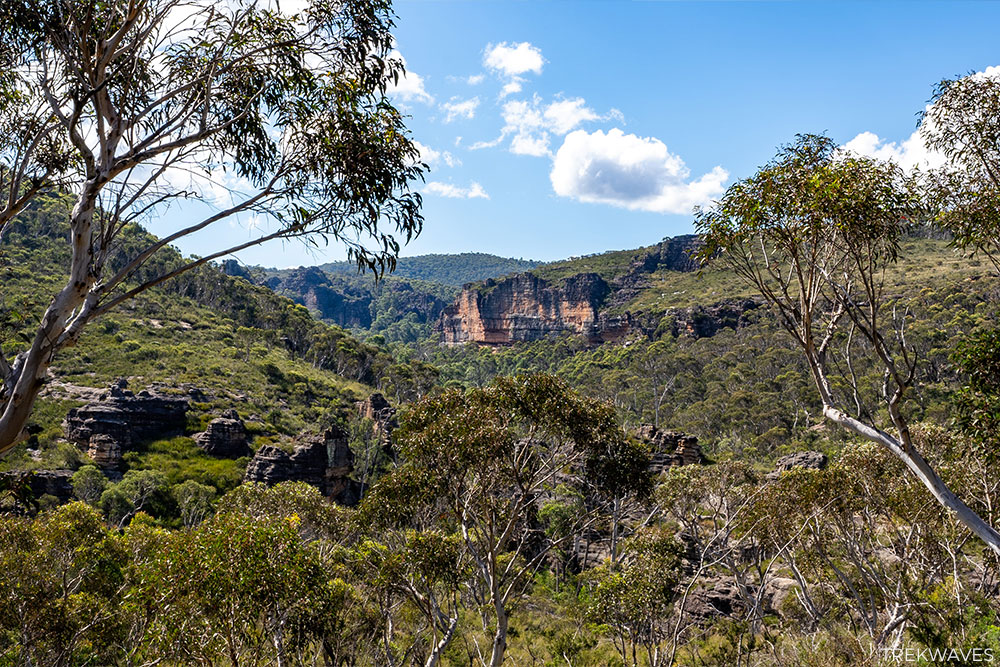
As you approach the Wollangambe River, the trail may become less evident, and descending to the river may require some rock scrambling.
During my hike, I came across a large fallen tree forming a natural bridge across the river, allowing me to cross without even having to remove my shoes.
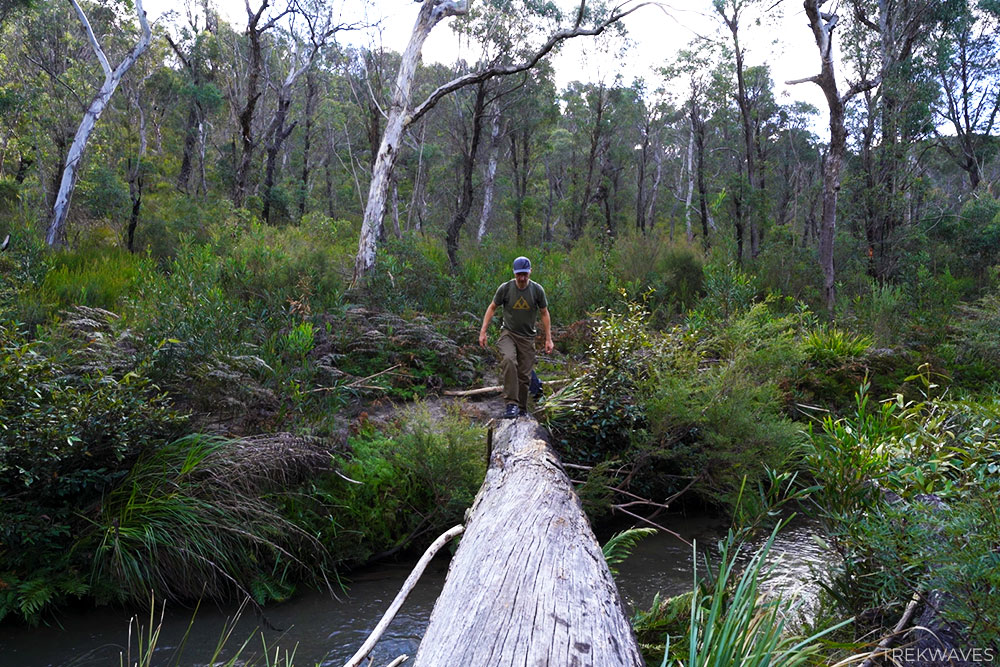
The river isn’t particularly wide, and during my hike, it didn’t seem deep.
So, even if the tree bridge is no longer there, or if you’re crossing at a different spot, reaching the other side shouldn’t pose much of a challenge.
This spot also offers the perfect opportunity to take a short break and catch your breath, as the next segment of the hike will entail a relatively steep climb out of the valley.
Wollangambe River to Goochs Crater
Getting out of this valley might pose a challenge if you stick to the path outlined by AllTrails.
Fortunately, I met two friendly hikers who showed me a much easier way out. Interestingly, they were the only people I encountered during the entire day of hiking this trail.
By following the rough path indicated on the map below, your ascent should be much smoother.

However, I would advise following the AllTrails path on the way back, as the original trail goes through an amazing viewpoint.
Continuing along the ridge, the next part of the walk offers easy terrain with mostly flat ground.
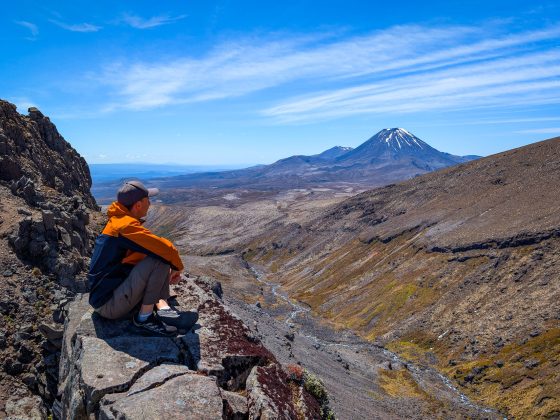
As you approach Goochs Crater, you’ll be treated to some breathtaking pagoda rock formations that bear a resemblance to quaint hillside homes—truly unique and picturesque.

After soaking in the scenic vistas surrounding Goochs Crater, it’s time to find the entrance into the area.
You’ll go down another steep rock slab, which might seem daunting at first glance, but the descent shouldn’t pose much of a challenge on a dry day.

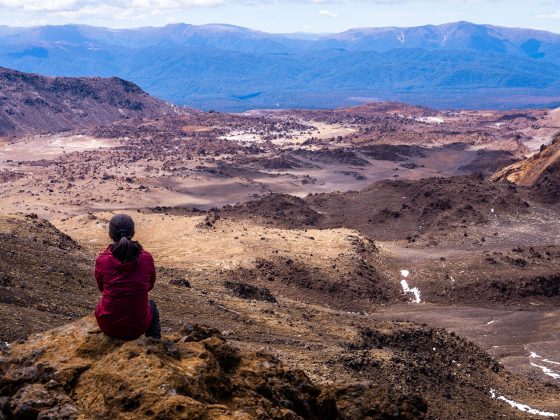
Goochs Crater
Once you’ve descended down, you’re just a short distance from Goochs Crater. Keep moving eastward, and when you’ve gone up another hill, turn left at the next junction.
The sights and rock formations surrounding you are incredibly unique, so you’ll likely walk a bit slower to fully admire the views.
After another 400 meters of walking, you’ll arrive at Goochs Crater, where you can enjoy the serene symphony of frogs croaking amidst the tall grass surrounding the crater lake.

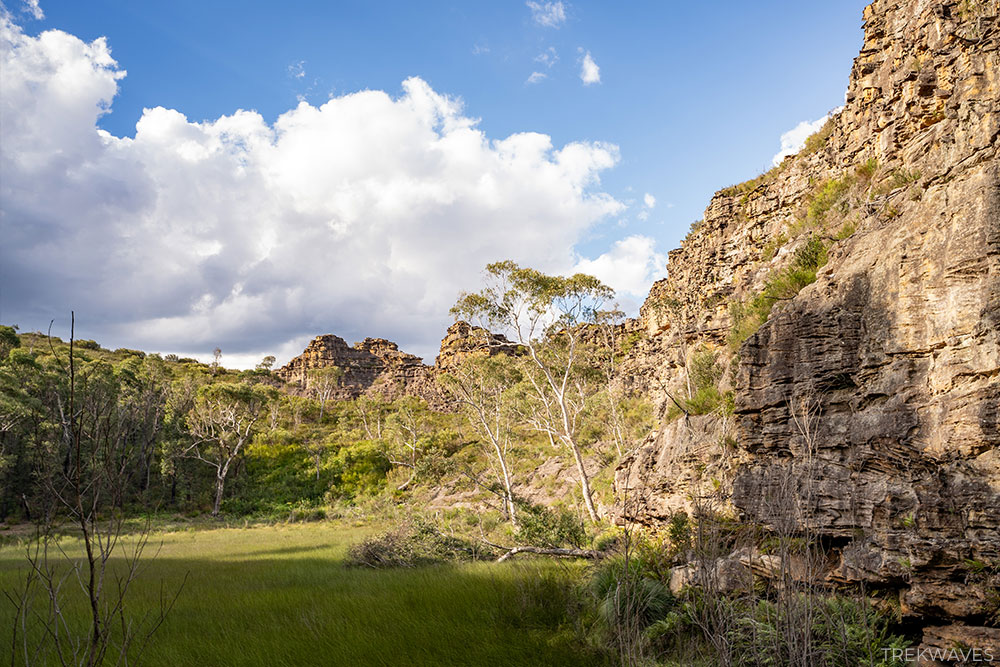
Goochs Crater is a stunning natural wonder, resembling a crater-like swamp embraced by majestic pagoda-like rock formations.
It’s named in memory of Nicholas Andrew Gooch, who first discovered the place in 1978.
Goochs Crater is roughly 105 meters long and 65 meters wide at its northern end, gradually reducing to about 35 meters at the southern end. The slope at the northern edge descends steeply and evenly to the ridge top above the crater.
Despite its appearance, this unique landscape wasn’t shaped by volcanic activity.
Although there are trails to discover around the crater, I made the decision to head straight for Billabong Canyon as the day was drawing to a close.
While AllTrails suggests a trail on the right side of the lake, during my visit, the crater still contained water from flash floods the previous week, making the path impassable.
I made the decision to head back south using the same route that brought me to the crater originally, then turned left at the next junction.
Camping Cave
Following the route I took to Billabong Canyon, the trail eventually leads to a massive cave beneath a towering cliff, known as the “Camping Cave,” often utilised by bushwalkers on overnight trips to Goochs Crater.
I must admit, this cave, resembling a vast overhang, stood out as my favorite spot during the entire hiking adventure. I lingered here, thoroughly enjoying the magnificent view.

If you’ve seen the video on my YouTube channel, you’ll know that I opted to abandon the idea of reaching Billabong Canyon when I came across the very steep section leading there.
With the weight of my video gear and my energy levels dwindling, coupled with the late hour, I made the call to turn back to the starting point.

Return Trail To Dargan
As I retraced my steps back to the starting point, I opted for a steep descent towards the Wollangambe River.
The viewpoint just before the descent offered stunning vistas, prompting me to take a final break and relish the scenery in the soft light of the setting sun.


Final Thoughts
In summary, this trail and its surroundings offer an incredible experience with truly unique rock formations and pagoda landscapes.
However, navigating the trail can be challenging, and traversing in and out of the valleys requires a good level of fitness.
It’s important to note that this isn’t a trail suited for beginner hikers, and the area is quite remote.
If you choose to venture here, make sure you’re well-equipped with the necessary gear, plenty of food, and water.
Found it Helpful? Pin it For Later!

Frequently Asked Questions (FAQs):
How long does the trail take?
- Set aside a minimum of half a day for this trek. Even though the trail isn’t overly long, navigation can be difficult, especially for first-timers. You may find yourself veering off track a few times, so it’s best to allow for extra time
What about signage and trail quality?
- There are no signs along this trail
How difficult is the trail?
- Given the challenging blend of unmarked and off-the-beaten-track trails, plus the considerable climb of over 500 meters, I would rate this trail as hard
What essentials should I carry?
- Bring along at least 2 litres of water, sunscreen, a hat, snacks and PLB since this a remote area
Is the trail wheelchair accessible?
- No
When is the best time to visit?
- It’s your call, but I suggest avoiding a late afternoon start to ensure you’re back before it gets dark
Is there phone service?
- Very limited
Can I bring my dog?
- Pets and domestic animals (other than certified assistance animals) are not permitted